Having packed up two of my telescopes, my wife and I embarked on a two day drive pulling our camper to Cool Breeze campground in Virginia. The end of the second leg of the drive took us a little longer than expected...our GPS took us the "scenic route" over a mountain. Great scenery, but late arrival!


We arrived at the campground for ECVAR late Tuesday afternoon, and we proceeded to settle in for a week of video astronomy!
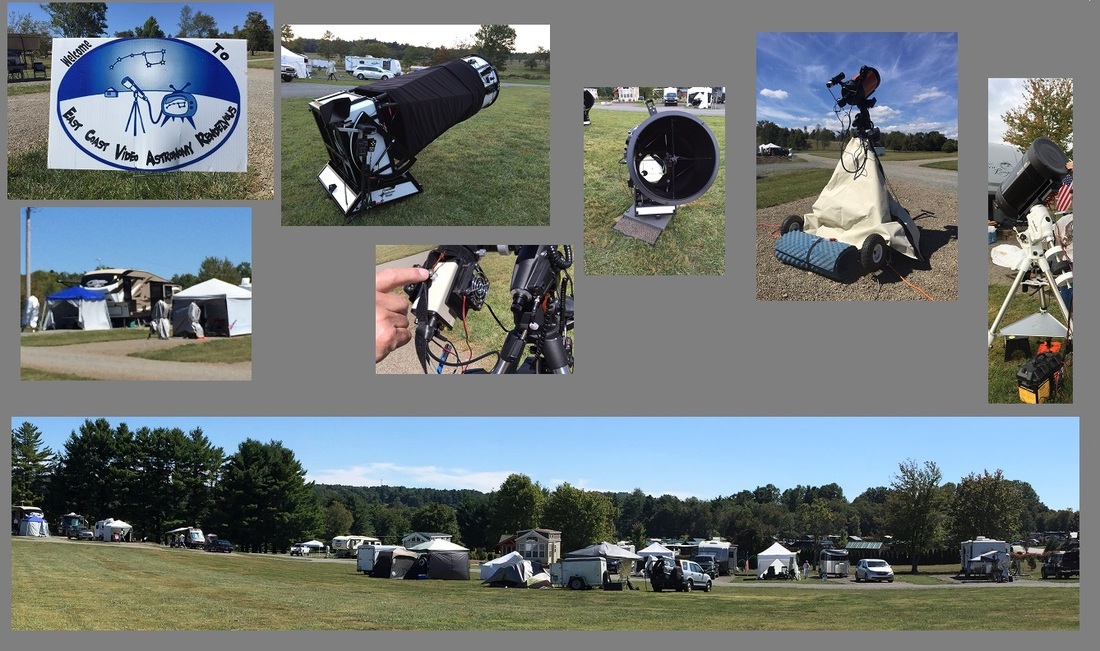
Tuesday night
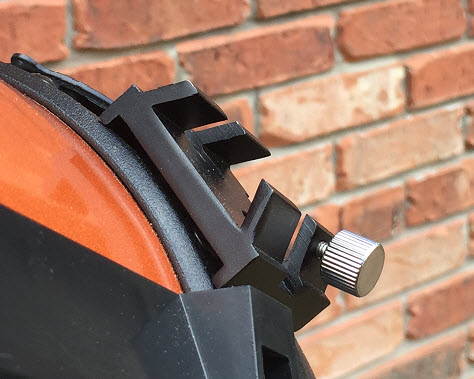
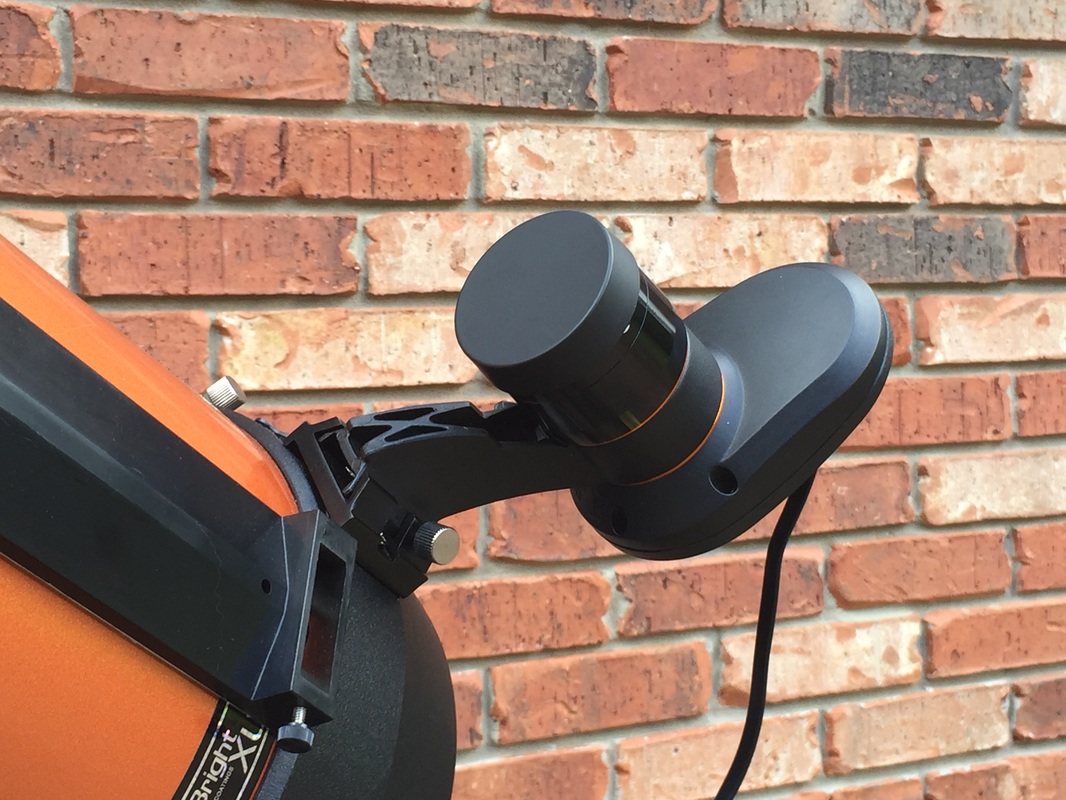
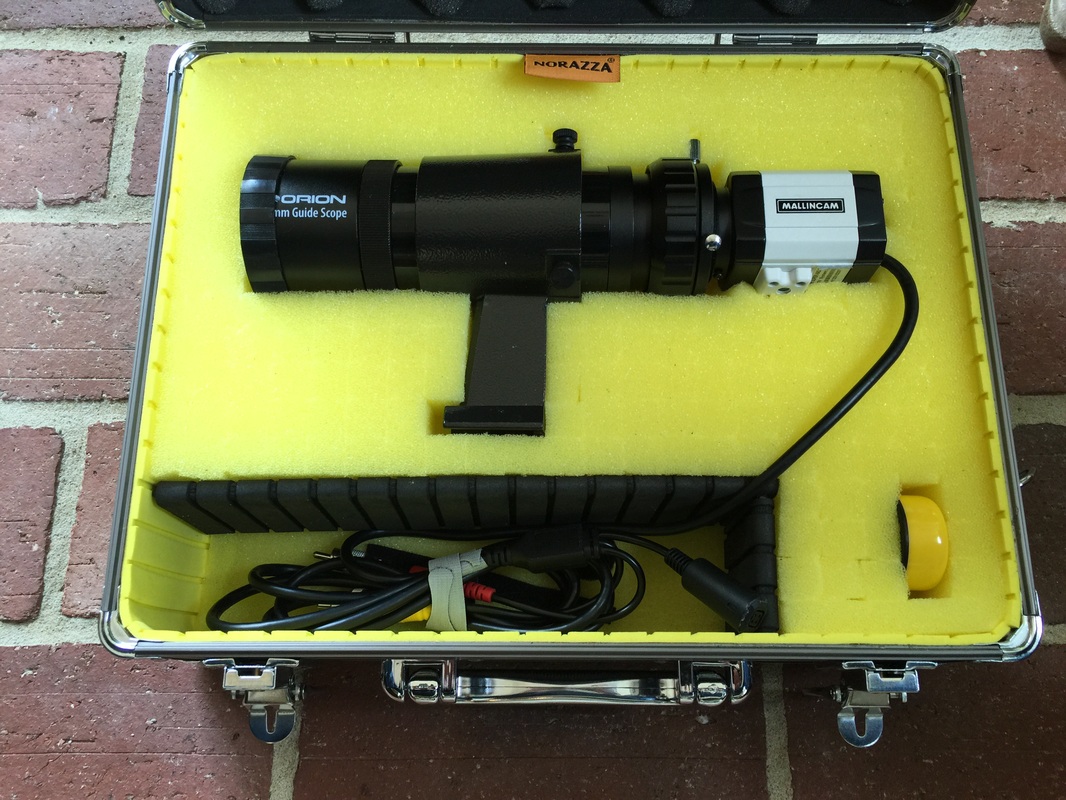
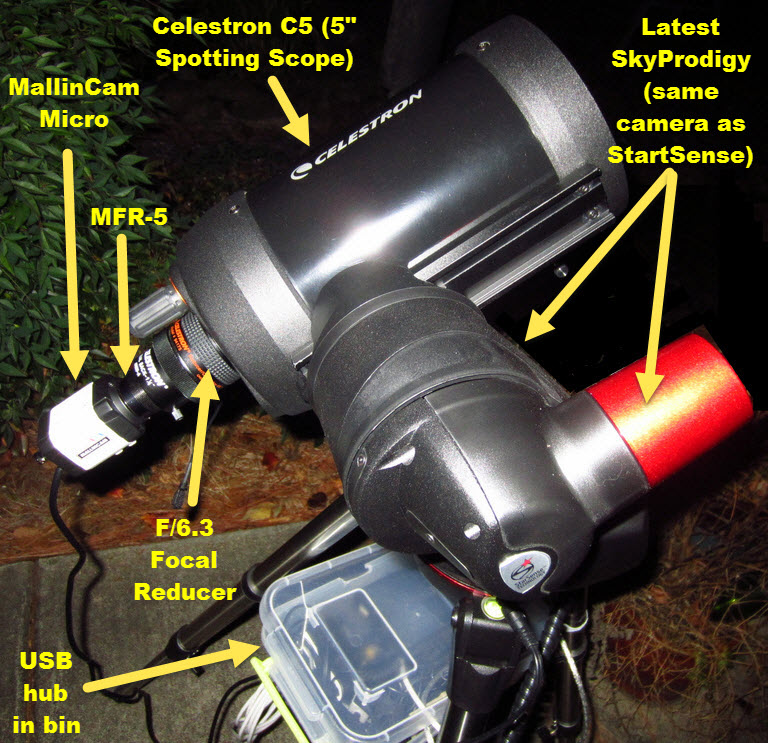
Later as it got dark, we stepped outside, looked up and were amazed at what we saw. The Milky Way was painted from one end of the sky to the other! I was able to set up my portable mount (after midnight) and try out my Remote Focus Mask and Dark Mask using the following equipment:
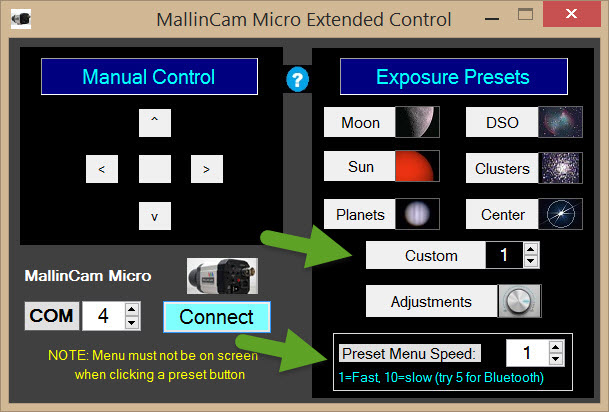
I turned on the mount and started an AutoAlign while getting my laptop powered up. I then slewed to Vega, entered the command to close the Focus Mask over the end of the dew shield, and clicked on the focus setting on my MMEC app. Then I remotely adjusted the focus until the mid-line was between the X of the other two diffraction patterns.
Later as it got dark, we stepped outside, looked up and were amazed at what we saw. The Milky Way was painted from one end of the sky to the other! I was able to set up my portable mount (after midnight) and try out my Remote Focus Mask and Dark Mask using the following equipment:
- SkyProdigy Mount with AutoAlign built in
- Celestron 5" telescope
- MallinCam Micro-Super
- MallinCam MFR-5 with 5mm spacer
- JMI Motofocus with PCFC for remote focusing
- Remote Focus Mask (prototype)
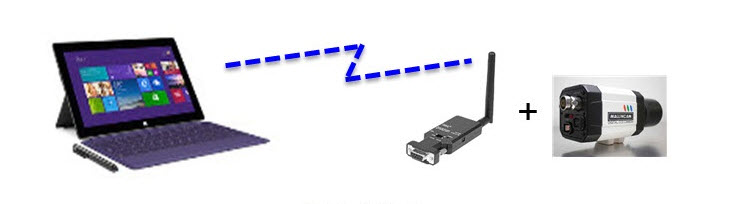
- Powered Hub at scope with single USB cable to MS Surface Pro 2
- MiloSlick for video, MMEC for controlling the Super and Starry Night to control the mount
I turned on the mount and started an AutoAlign while getting my laptop powered up. I then slewed to Vega, entered the command to close the Focus Mask over the end of the dew shield, and clicked on the focus setting on my MMEC app. Then I remotely adjusted the focus until the mid-line was between the X of the other two diffraction patterns.

Next I entered the command to open the Focus mask for normal viewing. I slewed to M27 and clicked on an MMEC preset useful for centering faint objects, and then used the Starry Night manual mount controls to get M27 centered. I clicked on the MMEC DSO preset (which uses x1024) and waited for the screen update. Here is the image of the Dumbbell Nebula that I saw using my 5" telescope and MC Micro-Super entry level video astronomy camera.

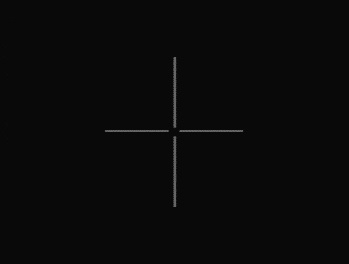
Then a thought occurred to me ... whether it might be useful to have a dark frame image at x1024 for the Super. So I got my felt pouch and put it over the focus mask, entered the command to close the Mask over the end of the dew shield, and waited for the image to appear. Here are pics of the Remote Dark Mask open and closed over the end of the dew shield.
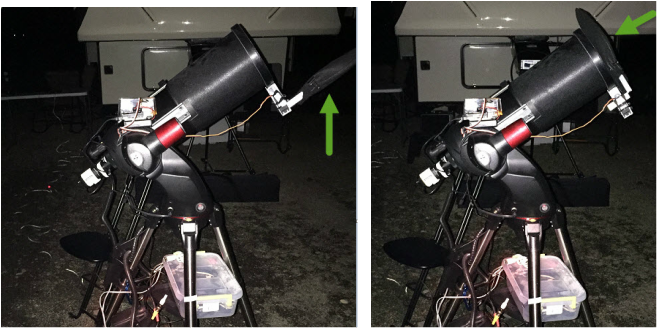
Now with no light entering the telescope, the next image I saw was dark. I mean really dark. The Micro Super has virtually no amp glow! And to my surprise I did not see any hot pixels either (camera pixels that are stuck on and look like small stars)! It was about 50 degrees outside at this time. I even used the MiloSlick software to scan the image for hot pixels and it did not find any. This just reinforced my opinion that the MallinCam Micro is a great entry level video astronomy camera, especially the Micro-Super!
I also felt good about how the Remote Focus Mask and Remote Dark Mask concept actually worked in the field. But by this time it was way past my bedtime and I had to defer its further testing to another night.
I also felt good about how the Remote Focus Mask and Remote Dark Mask concept actually worked in the field. But by this time it was way past my bedtime and I had to defer its further testing to another night.
Thursday and Friday nights
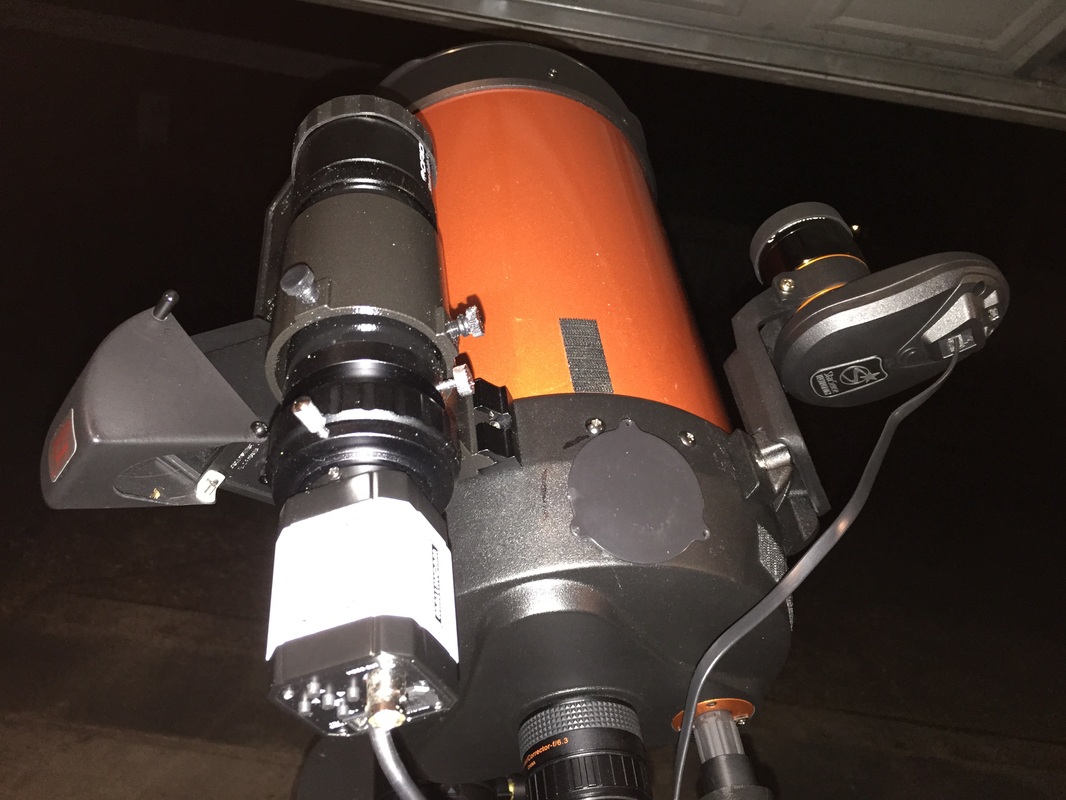
Unfortunately Wednesday night at ECVAR had some clouds, but Thursday and Friday evenings were great and made up for it. On Thursday I had my main telescope set up with the following equipment:
The NexGen Focal reducer essentially converts my C8 F10 telescope to F3.3. The single USB cable from the powered hub at the telescope enables me to operate underneath a nearby canopy, or using an active USB extension cable I can move inside for warmer viewing.
Unfortunately Wednesday night at ECVAR had some clouds, but Thursday and Friday evenings were great and made up for it. On Thursday I had my main telescope set up with the following equipment:
- Celestron CG-5 Equatorial Mount
- Celestron 8” Telescope
- JMI Motofocus with PCFC for remote focusing
- NexGen MAXfield 0.33X Telecompressor
- MallinCam X2 Deluxe with Class 0 sensor
- StarSense AutoAlign accessory
- Celestron GPS accessory
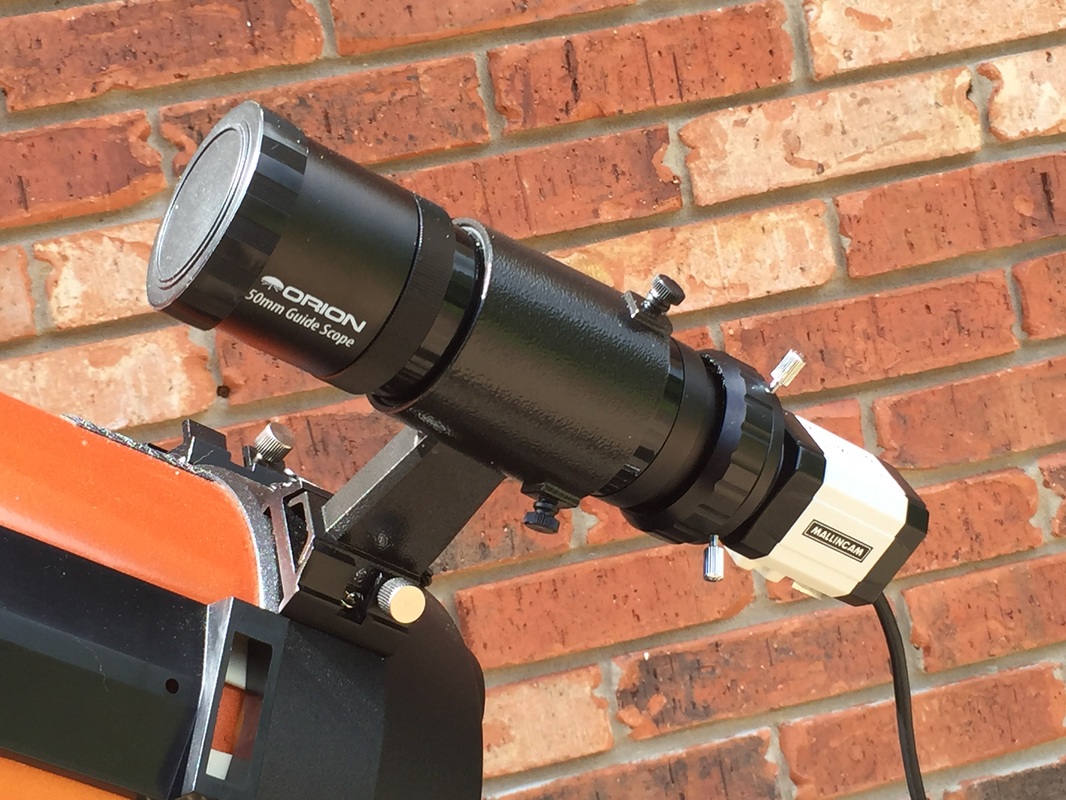
- MallinCam Micro-EX on Orion 50mm finder scope
- Powered Hub at scope with single USB cable to MS Surface Pro 2
- MiloSlick for video and X2 control, MMEC for Micro Control and Starry Night to control the mount
The NexGen Focal reducer essentially converts my C8 F10 telescope to F3.3. The single USB cable from the powered hub at the telescope enables me to operate underneath a nearby canopy, or using an active USB extension cable I can move inside for warmer viewing.


Here are some of the screen grabs of the near real time images I saw on my screen. Keep in mind these are "live" views at 10-20 second update intervals with no stacking or post processing.

M27 Dumbbell Planetary Nebula

M57 Ring Nebula

NGC6946 Fireworks Galaxy

M92 Globular Cluster in Hercules

M103 (Can you see the "Micro dipper")

NGC891 Edge-on Spiral Galaxy

M33 Pinwheel Galaxy

NGC 6888 Crescent Nebula

NGC6992 Veil nebula
Thursday and Friday nights at ECVAR were the best skies I have ever been under for Video Astronomy!
More on Friday night
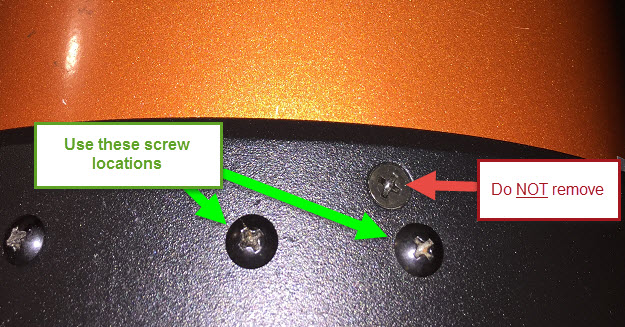
Later Friday night I also tried out the SkyRaider DSc with a MFR-3 focal reducer and 5mm spacer on my Celestron 5" with my SkyProdigy Alt-Az mount.
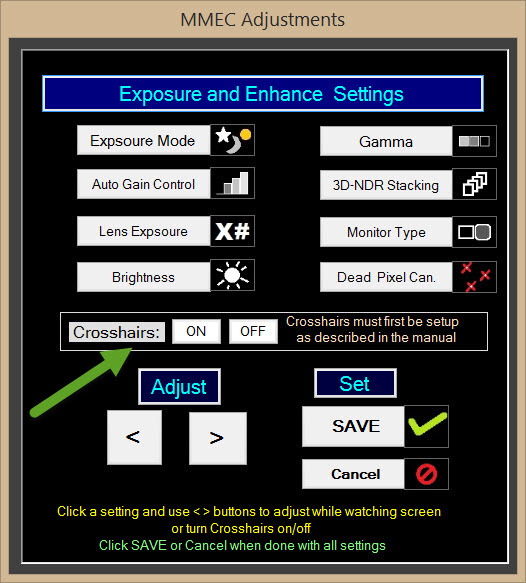
After using my Remote Focus Mask to achieve a good focus, I placed the black felt pouch over the mask to convert it to a Remote Dark Mask. I typed my close command on my laptop to move the Remote Dark Mask over the end of the dew shield, and captured three (quality=3) 60 second dark exposures as suggested by Chris A (even though my planned viewing exposures were 15-20 seconds). Chris has found that these initial set of dark exposures typically are good for the evening, unless the temperature changes drastically over 5 degrees or you go over 2 hours of viewing. If new darks are needed later, I can just type the command to close the Remote Dark Mask and take a new set. I left the histogram and other settings at their default values for the dark capture process.
I then typed the open command on my laptop to remove the Remote Dark Mask from the end of the dew shield for normal viewing. I enabled the Dark Field Correction for viewing all images and adjusted the real time histogram as needed for each target.
Here are some image grabs (no stacking or post processing) using the MC DSc on my smaller 5” Celestron.

M27 Dumbbell

M57 Ring Nebula

NGC 891 Galaxy

M33 Pinwheel

NGC 6992 Veil

NGC6888 Crescent


 RSS Feed